When it comes to home improvement, few tasks are as integral to a home’s function and safety as plumbing installation. Whether you’re building a new home, renovating a bathroom, or simply replacing outdated pipes and fixtures, a successful plumbing installation requires careful planning, precision, and a thorough understanding of the system’s workings. From the initial design to the final step of testing, mastering plumbing installation is crucial for ensuring that water flows seamlessly, waste is properly disposed of, and your plumbing system stands the test of time. In this article, we will walk through the step-by-step process of plumbing installation, providing expert insights to help you achieve a professional-grade result in your home.
Step 1: Plan Your Plumbing Layout
Before you even touch a wrench or pipe, the first and most important step in any plumbing project is the planning stage. A well-thought-out layout is key to ensuring the installation is efficient, functional, and up to code. Whether you are installing new plumbing for a kitchen, bathroom, or laundry room, the layout should be carefully planned to optimize water flow, minimize waste, and avoid future maintenance issues.
1.1 Determine the Water Supply and Drainage Systems
The water supply system brings fresh water into your home, while the drainage system carries away wastewater. Before installation, assess where the primary water supply lines and drainage pipes will be located. You’ll need to decide the routing of both systems, ensuring they meet at specific points, such as faucets, sinks, toilets, and appliances like dishwashers or washing machines. Make sure to account for necessary pipe sizes, flow rates, and pressure needs.
1.2 Review Local Plumbing Codes
Each jurisdiction has its own set of plumbing codes that must be followed to ensure safety and compliance. Familiarize yourself with local building codes to avoid fines or costly rework later. Codes will provide information on pipe material standards, proper pipe sizing, ventilation, and vent stack requirements.
Step 2: Gather Your Tools and Materials
Having the right tools and materials is crucial to completing the job efficiently and ensuring a leak-free installation. Depending on your specific project, the tools you may need can range from basic hand tools to more specialized equipment. Here are some of the most commonly used tools and materials for plumbing installation:
2.1 Tools:
-
Pipe Wrenches: Used to tighten and loosen pipes and fittings.
-
Pipe Cutters: For cutting pipes to the correct length.
-
Plumber’s Tape: Sealing tape used to prevent leaks in threaded pipe connections.
-
Basin Wrench: Essential for installing faucets and other fixtures in tight spaces.
-
Level: Ensures that pipes are installed at the proper slope, particularly in drainage systems.
-
PVC Primer and Cement: Used to bond PVC pipes and fittings.
-
Pipe Benders (for copper pipes): To form smooth curves in copper pipes.
2.2 Materials:
-
Pipes: PVC, PEX, or copper pipes, depending on the system’s needs and your local codes.
-
Fittings: Elbows, tees, couplings, and adapters are necessary to connect sections of pipe.
-
Valves: Ball valves, gate valves, and angle valves regulate the flow of water.
-
Flanges and Seals: Prevent leaks where pipes connect to fixtures.
-
Pipe Insulation: Helps prevent freezing and reduces energy costs.
Step 3: Shut Off the Water Supply
Before beginning any plumbing work, it’s critical to turn off the water supply to avoid flooding the area or creating leaks. Locate the main water shut-off valve for the home and ensure it is fully turned off. If you are working on a specific section of the plumbing system, you may only need to shut off the water to that part of the system.
Once the water is off, relieve any remaining pressure in the system by opening the faucets and flushing toilets. This will allow the pipes to drain and make the installation process much cleaner.
Step 4: Install the Pipes and Fixtures
Now that you’ve planned the layout, gathered your tools, and turned off the water, you’re ready to begin the installation process. The order and method of installation will depend on the specific project, but the basic steps for running pipes and connecting fixtures are fairly consistent.
4.1 Run Water Supply Pipes
Begin by installing the cold water supply pipes first, followed by the hot water supply. The primary consideration when installing these pipes is ensuring that they slope slightly downward (about 1/8 inch per foot) to prevent water from accumulating and stagnating.
-
For PEX Pipes: These are flexible and easy to install. Cut the required lengths, use fittings that correspond to PEX (such as crimp rings and fittings), and secure with a crimp tool.
-
For Copper Pipes: Use a pipe cutter to trim the copper pipe, then use a propane torch to solder the fittings. Make sure to clean the pipe before applying flux and solder.
4.2 Install Drainage Pipes
Once the supply lines are in place, move on to the drainage pipes. These pipes typically need to be installed with a slight slope (usually around 1/4 inch per foot) to ensure that wastewater flows away properly. Use the correct piping materials, such as PVC or ABS, and ensure that connections are tight and sealed properly.
-
PVC Drainage System: Apply PVC primer to the pipe ends and fittings before applying PVC cement. This will help ensure a secure, leak-free connection.
-
Check Venting Requirements: Proper venting is crucial to prevent vacuum buildup in the pipes. Vent pipes should rise vertically through the roof to allow air to enter and relieve pressure.
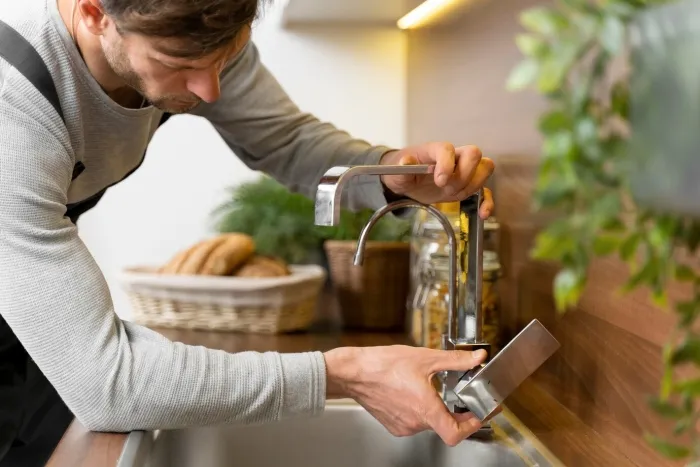
4.3 Install Fixtures
Once the pipes are in place, you can begin installing the fixtures. This includes faucets, toilets, sinks, bathtubs, and other appliances. For each fixture, ensure that connections are secure and use plumber’s tape or thread sealant to prevent leaks.
-
Toilets: Install the wax ring on the toilet flange before setting the toilet down and bolting it into place. Connect the water supply line and test for leaks.
-
Faucets and Showerheads: Use a basin wrench to tighten faucet connections under sinks, and ensure showerheads are properly screwed into place. Always check for leaks by turning on the water slowly.
Step 5: Test the System
Once all pipes and fixtures are installed, it’s time to test the system to ensure everything is functioning correctly. Turn the water supply back on slowly, checking each fixture for any leaks or irregularities. Run water through sinks, tubs, and toilets to ensure the system is pressurized correctly and water is flowing freely.
-
Check for Leaks: Inspect all connections, including the joints, fittings, and seals. If any leaks are found, turn off the water supply, tighten the connection, and test again.
-
Check Drainage: Run water through the drains and ensure that it flows freely without any backups or slow drainage.
-
Flush Toilets: Test each toilet to ensure that it flushes correctly and refills as it should.
Step 6: Clean Up and Final Inspection
Once everything is functioning as expected, the final step is to clean up the work area. Remove any debris, tools, and excess materials, and perform a final inspection of the plumbing system. If you’re satisfied that everything is in place and there are no leaks, you can proceed with restoring the area to its original state.
6.1 Consider Adding Insulation
If the plumbing is exposed to cold temperatures, consider adding pipe insulation to prevent freezing during winter months. Insulating pipes can also improve energy efficiency by reducing heat loss in hot water pipes.
Conclusion
Mastering plumbing installation is an essential skill for homeowners looking to improve or renovate their homes. By carefully planning your layout, gathering the necessary tools and materials, and following the proper steps for installation and testing, you can ensure a successful and long-lasting plumbing system. Whether you’re tackling a simple faucet installation or a complete system overhaul, the process requires patience, precision, and attention to detail. With these steps in mind, you can confidently handle your plumbing installation project and enjoy the benefits of a fully functioning, efficient, and reliable plumbing system for years to come.